Recordings made in lecture theatres and other teaching spaces
Instructions for the lecture theatre recording system and where to find support.
Recordings availability
Recordings from the lecture capture system will be released to students – via Panopto – 24 hours after the lecture. If you need to make edits to the recording, you should do so within this time frame. Staff will be able to publish videos early or extend the publishing delay time (up to a maximum of 72 hours). Staff electing to release videos after 72 hours must have a compelling reason for the long delay and should consider the impact on students, including equity student groups.
Students identified as studying online (Canvas course Section codes OO, NO, or NZ), do not have a timetable because they are not attending on-campus lectures. This means they will not necessarily know when recordings will be available. Course coordinators should advise these students when to expect the these so they can manage their study time accordingly.
Students studying in China may need to use the Forticlient Virtual Private Network (VPN) Service to access the lecture recordings.
Recording of taught content exemptions
There may be cases where automatic recording or captioning may not be suitable due to privacy concerns. For details on when a recording exemption may be appropriate and how to apply, visit the guide to recording of taught content exemptions.
Teaching spaces
Please visit the central website for a list of recording-enabled lecture theatres and other teaching spaces.
Please also note that streaming live lectures via Zoom has been made available.
Hybrid spaces
The equipment in teaching spaces is managed by Learning Environment Support Unit (LESU), who have rolled out several hybrid teaching spaces equipped with additional microphones to pick up the questions asked by students during the session.
What is recorded?
All scheduled lectures delivered in recording-enabled rooms are recorded automatically and released to students via the Panopto Video menu in your Canvas course. Remember, the recording ALWAYS captures what is projected to the main Recordable Projector 1. For example, if you use the document camera, make sure this is fed to the main screen while you are presenting.
- Recordable Projector 1 is the primary stream. Projector 2 is the secondary stream.
- We recommend that you display your teaching material on Recordable Projector 1 (primary stream), e.g., slides, annotation board, or document camera.
- Some rooms are set up to capture both streams (Recordable Projector 1 and Recordable Projector 2). If something different is presented on Recordable Projector 2 (e.g., the document camera), this will be recorded as a secondary stream, otherwise it will be blank.
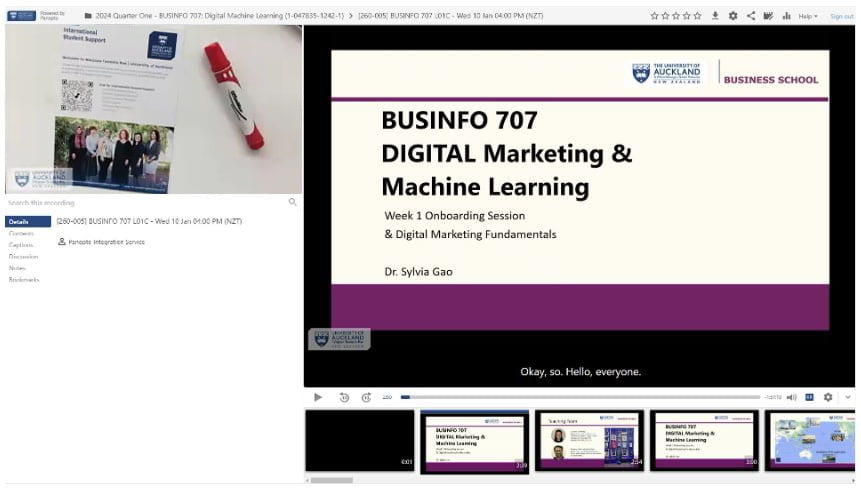
Screenshot of a lecture theatre recording in Panopto. The document camera is captured in a smaller screen next to the larger recording of PowerPoint slides.
Note: Teaching staff can edit the recordings and remove the secondary video stream if desired.
Before the lecture
Visit this guide on UoA Tutoring Central on how to use classroom lecterns
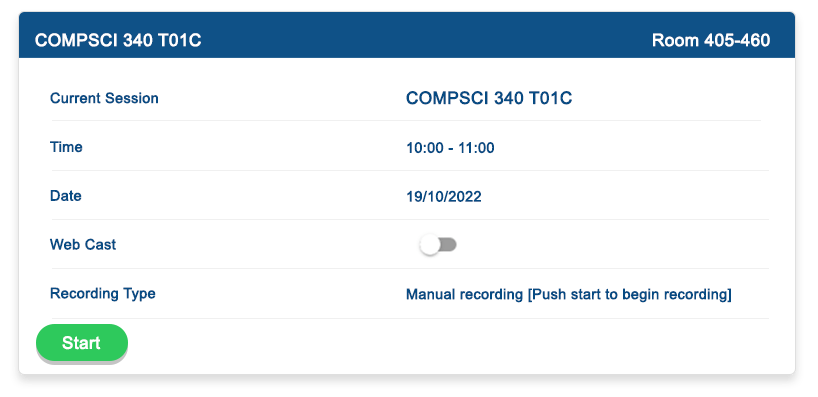
Step 1: Check that the lecture recording has started
The schedule will show the current session and recording status, plus upcoming sessions. A scheduled lecture will automatically start recording at the session start time.
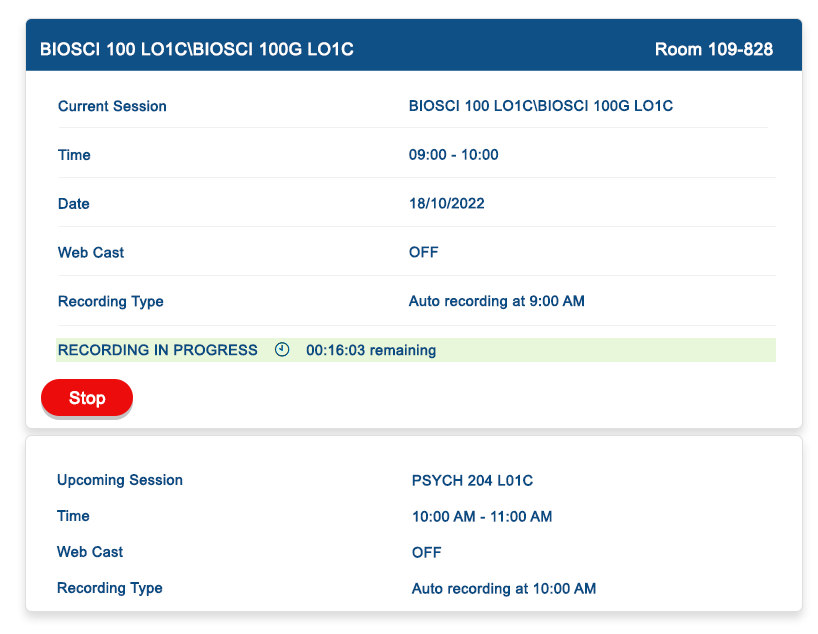
The recording can be stopped if you finish early. It automatically stops recording at the end of the scheduled session.
CAUTION: Pressing Stop then Start during the recording will create an additional video recording. There is no PAUSE option with lecture recordings but the recording can be trimmed after the session if required.
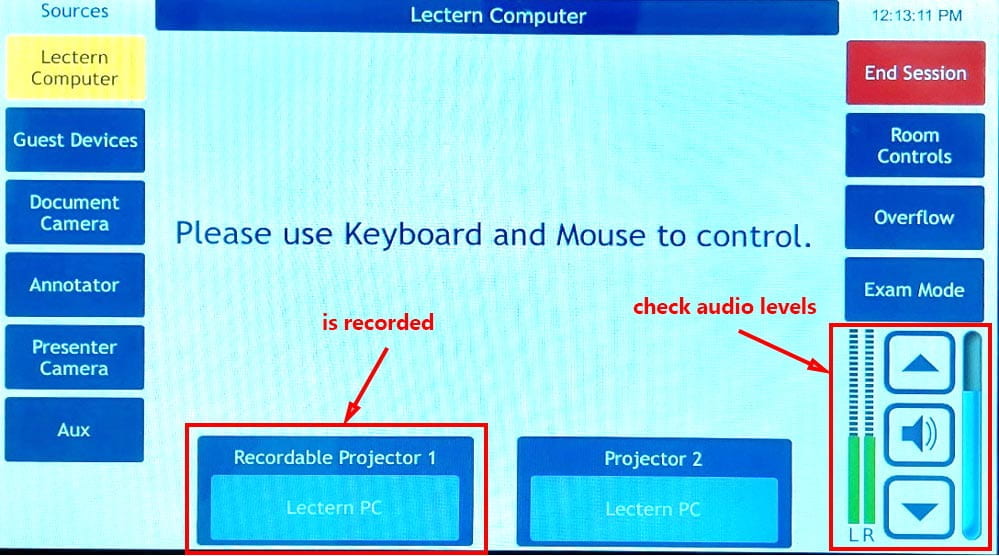
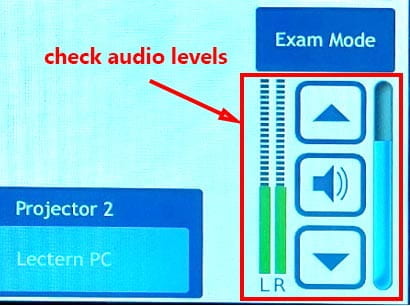
Step 2: Check the recording inputs on the touch panel
Only the Recordable Projector 1 input will be recorded. The audio meter shows the audio being captured.
Step 3: Check the status of the microphone
Make sure the microphone is turned on and unmuted. There is a switch at the top of the device.
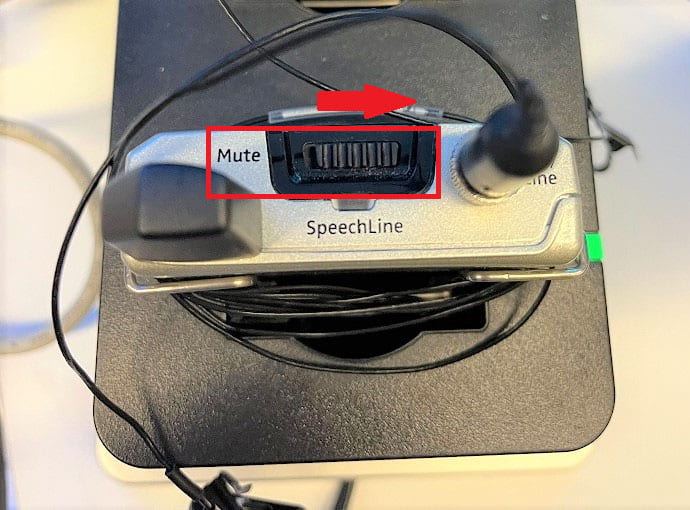
Check that your lapel microphone is the one associated with the lecture theatre you are using.
Check the audio levels on the touchscreen to make sure the microphone will be recorded.
Step 4: Check that the presentation is being captured
On the Monitoring Light Indicators, make sure both the video and audio indicators are green.

If using a Macbook or iPad as a Guest Device
- Only the official Apple cable must be used otherwise, an HDCP error will prevent the recording from being captured. The projector will display correctly but the recording will be green screen. For example:

The recording preview will show a green screen rather than what’s being sent to the projector.
- When connecting to HDMI adapter – the HDMI cable in the room must be connected to the adaptor BEFORE connecting the adapter to the iPad or Macbook. If this is not done there will be flickering on the projector – to fix the issue disconnect and reconnect the cables in the correct order.
During the lecture
- We do not recommended that you stop the recording during the lecture. If you stop and start you will create two recordings. Instead, mark out the part of the recording that you want to exclude, once it has uploaded to Panopto.
- If you include discussion-based activities, note the time that these begin and end, or use a visual cue such as a PowerPoint slide to indicate that a discussion or activity has started. This makes it easier to find these sections in the recording later, to edit them out.
- If you receive questions from students during the lecture, repeat these so they are captured by the microphone.
- Step away from the microphone (or temporarily mute it) if answering questions of a sensitive or private nature.
- Use Extend Desktop if you want to play a video but not record it.
After the lecture
Edit your recording after your lecture has been recorded and before it is automatically published.
Instant/ad-hoc recordings
Are all teaching activities automatically recorded?
Only scheduled lectures are automatically recorded. Teaching activities such as tutorials, workshops, labs seminars, clinics, studios, team based learning etc., are not scheduled to be recorded but will show in the schedule.
To record these sessions click Start on the Lecture Recording Schedule app. The recording will be uploaded to the course folder in Panopto and accessible from the Panopto Video menu in Canvas.
You can request non-scheduled sessions to be recorded automatically via Staff Service Centre. Phone external: +64 9 923 8600, internal: ext 86000.
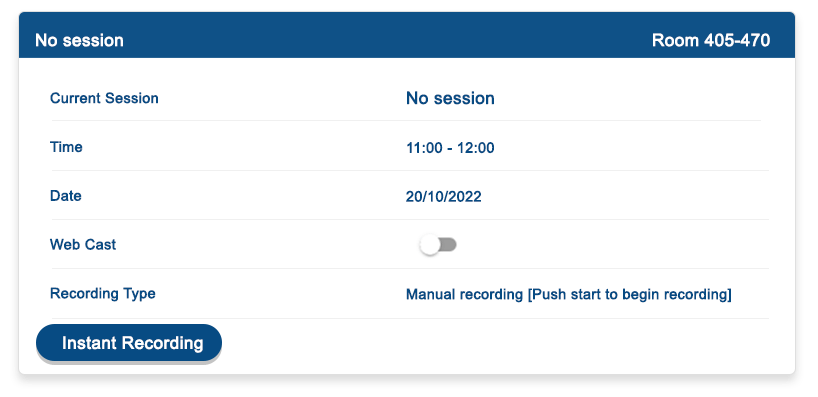
How do I start a new recording when one hasn’t been scheduled?
If there is no session scheduled in the room, an instant recording can be started from the Lecture Theatre Recording Scheduler by clicking Start Recording.
1. Enter a description and username* (the recording link will be sent to the staff members email address)
2. Update the end time and click Start.
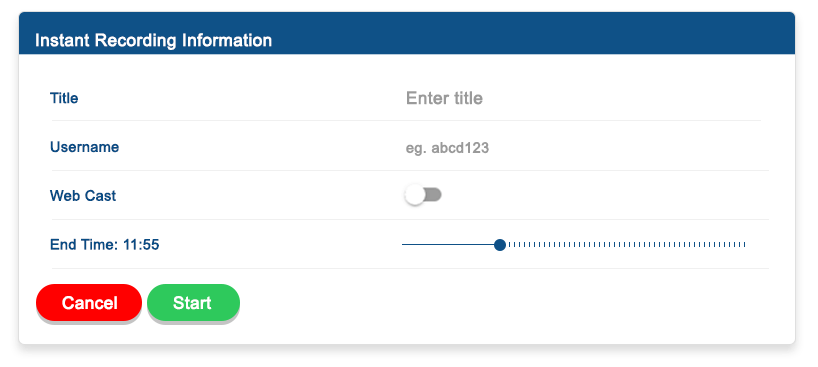
Note: Ad-hoc recordings are automatically uploaded to the presenter’s personal folder (My Folder) in Panopto. Once you have finished editing the recording, go ahead and move it to the course folder as required.
* The username must be an active staff member of the University, otherwise the recording will not be uploaded to Panopto.
How do I start a recording if there is a problem with the lecture capture system?
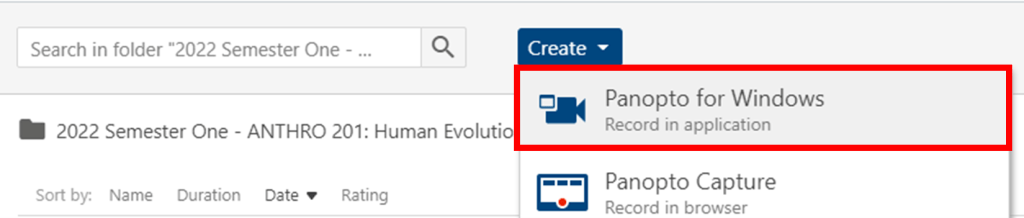
After notifying the LESU team (phone ext. 84800), Log in to your Canvas course and click Panopto Video.
Click Create to launch Panopto for Windows, which opens the Panopto Recorder (already installed).
- Click Record to start. When complete, click Stop.
- Capture PowerPoint allows you to record slides. If doing a demonstration, select Capture Main Screen.
- To capture the document camera, select Add Another Video Source, then select Capture Device, e.g., Logitech Screen Share.
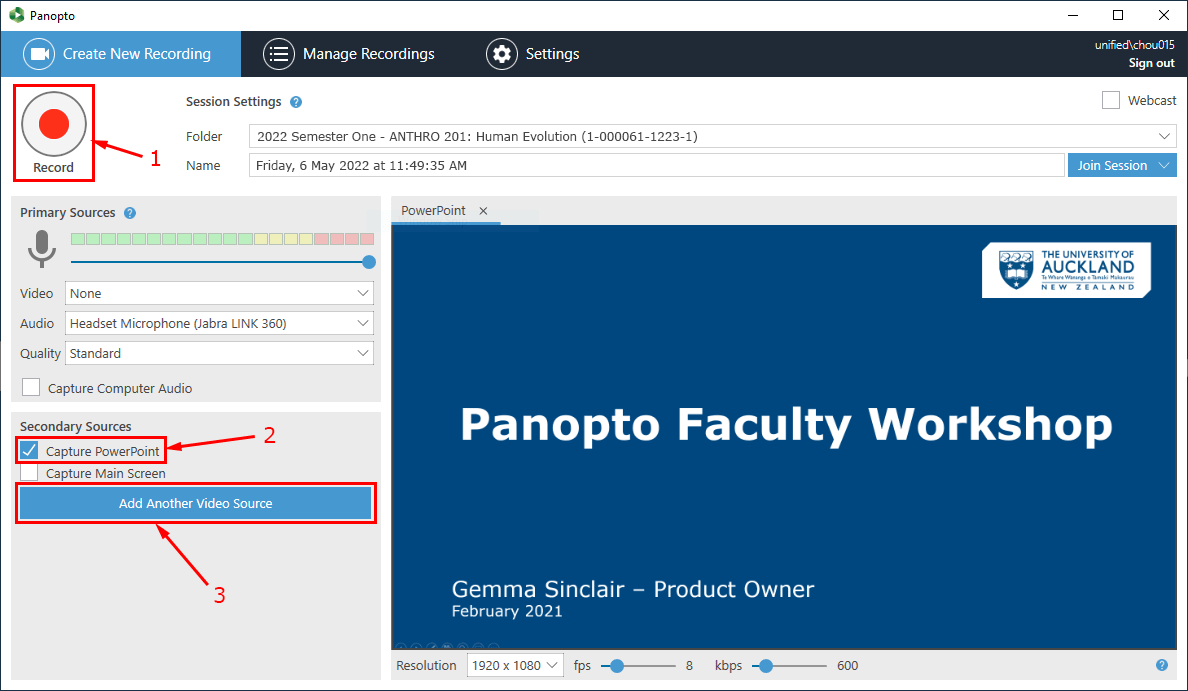
Note: Video/webcam is optional for lecture recordings.
Once you have stopped recording, click Done to upload the video. Do not log off until the upload has completed.
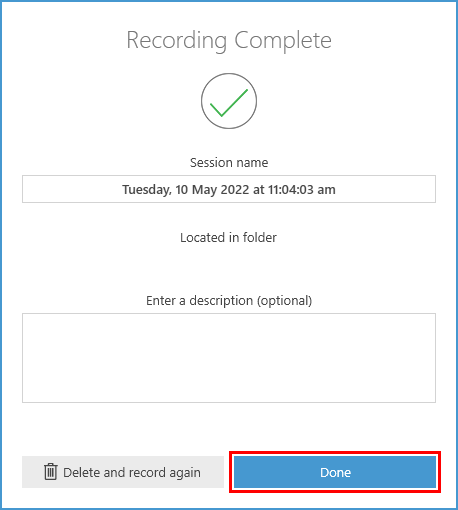
The recording will be published immediately to students unless the availability date in the video settings has been changed (e.g., to 24 hours later); this gives you time to edit the video if necessary.
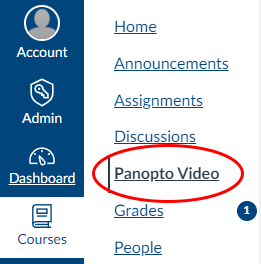
- Go to your Canvas course and open Panopto Video from the course menu.
- Locate the video that you just recorded (it may still be processing) and click the Settings button.
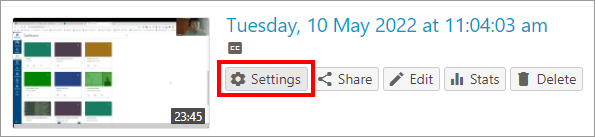
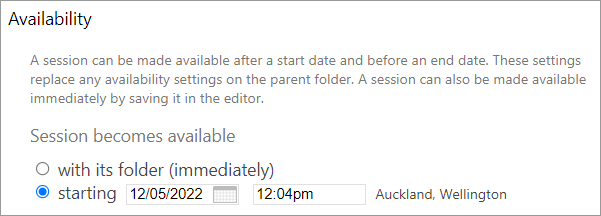
- Under the Overview menu, scroll down to Availability heading.
- Change the available date to 24 hours later.
Support
Room equipment

- For urgent faults relating to room equipment, Learning Environments Support Unit (LESU) have placed QR codes within lecture theatres and teaching rooms around our campuses. Scan the QR code with your phone (log in with 2FA)* and complete a request form. This will instantly alert the LESU technician rostered for your room, bypassing the Staff Service Centre. If the technician is busy on another job your request will be sent to all other technicians for an urgent response. The Staff Intranet lists LESU’s hours of support.
* Teachers are encouraged to install Two-Factor Authentication (2FA) on their mobile phones.
- For all other enquiries (non-urgent faults, room bookings, videoconferencing, AV support for a scheduled event etc.) contact LESU via the Staff Intranet.
Familiarisation with the equipment
Demonstrations by LESU technicians are usually scheduled before the start of Semester One.
Report unsafe activity
Report unsafe activity to University Security (Unisafe): Phone external: +64 9 923 5000, internal: 85000.
Recordings in Canvas
For queries related to lecture recordings in Canvas, please request support from the Learning and Teaching Team.
See also
Recording of taught content in lectures and other classes
The University’s recordings policy that focuses on recording versatile taught content, not just lectures.
Recording-enabled rooms
The central website lists the rooms with lecture recording and streaming capability.
Hybrid teaching spaces
Some teaching spaces are equipped with extra microphones to capture participants’ voices and can be used for hybrid meetings − a mixture of on-campus and on-Zoom participants.
Pre-record your teaching
If you wish to record your teaching from your home or office and publish it to your course later, use Panopto or Zoom. If you integrate Zoom with Panopto, your Zoom Cloud recording is uploaded to Panopto automatically.
Streaming live lectures
Live lecture streaming is available via Zoom.
Page updated 11/07/2025 (minor edit)