Accessibility practices and tools: Documents
Make Word, PowerPoint, and PDF files accessible to everyone.
Documents used for teaching—including handouts, slides, and supplementary readings—must be accessible for all students, including those using screen readers or other assistive tools. Start by designing for accessibility in Word or PowerPoint, then convert to PDF using the correct export process.
Why it matters
- PDFs that are not properly tagged or structured may appear blank or unreadable to screen readers.
- Students who rely on text-to-speech or keyboard navigation cannot access unstructured documents.
- Accessibility in documents is not just for students with disabilities—it also improves clarity, searchability, and mobile usability for everyone.
Word and PowerPoint (Microsoft 365)
Use Microsoft’s built-in accessibility tools when creating course materials:
- Use heading styles (Heading 1, 2, etc.) instead of manual formatting.
- Use the built-in list tools (bullets and numbering). Don’t create lists with hyphens or tabs.
- Include alt text for meaningful images, charts, and diagrams.
- Ensure sufficient colour contrast for text and backgrounds.
- Use table tools properly and define header rows.
- Use the Accessibility Checker (Review > Check Accessibility) before saving.
Creating Accessible PDFs
If you start in Word or PowerPoint:
- Use the “Save As PDF” option (not Print to PDF), so that it retains its structure and tags.
- Before saving, ensure headings, alt text, and table formatting are in place.
- Avoid scanned PDFs or images of text—these are not accessible to screen readers.
If editing existing PDFs:
- Use Adobe Acrobat Pro’s ‘Prepare for Accessibility’ tool.
- Tag headings, tables, and reading order.
- Run the full Accessibility Check in Acrobat Pro to identify and fix issues.
- Add a document title and language setting in File > Properties.
Common issues and how to fix them
Getting it right
In Microsoft Word
Headings
Use the Styles panel to apply heading levels. Headings not only format your document visually but also improve accessibility and navigation.

Links
- Highlight your text, right-click, and choose “Insert Link”.
- Edit existing links to show clear labels rather than raw URLs.
- Use the Accessibility Checker to confirm your link text is helpful.
Colour
Ensure your document’s text and background colours have sufficient contrast. If you have concerns with the contrast ratio, use the built-in Accessibility Checker tool.
Alt text
Right-click the image, choose “Edit Alt Text”, and add a description or tick “Mark as decorative”.
View more detailed support for adding alternative text in Word or PowerPoint.
Tables
- Use the “Design” tab to set the top row as a header.
- Ensure header rows repeat on each page if the table spans multiple pages (Word).
- Use the Accessibility Checker to scan for missing headers or structural problems.
View details about creating accessible tables in Word.
In Adobe Acrobat Pro
Tags
Ensuring your PDFs are tagged correctly is a vital step in making your documents accessible. Tags identify the semantic structure of a document and its individual components (paragraph text, headings, figures/images etc.), in a way that allows screen reader technology to relay structure and content.
Tags are stored in the background and do not affect visual appearance.
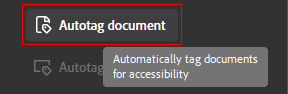
To begin, select ‘All tools’ > ‘View more’ > ‘Prepare for accessibility’ > ‘Autotag document’.
Headings
Headings outline the document’s structure, allowing users to easily navigate to various sections. They are tagged with H1 to H6, similar to Microsoft Word, with an additional general heading tag, H.
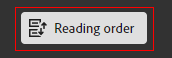
To check or fix the heading hierarchy, navigate to ‘Tools’ > ‘Accessibility’ > ‘Reading Order’ in the right panel. If any components have been incorrectly tagged, use the ‘Reading order’ panel to select the section and correct the tag.
Links
Automatic tagging usually handles links well, but it’s good to know how to do it manually if needed. Find out how to create links manually from Adobe Support.
Alt text
To check or fix the alt text in Acrobat, navigate to ‘All tools’ > ‘Prepare for accessibility’. Next, select ‘Set Alternate Text’. Acrobat will scan your document for images.
Tables
To check or fix the accessibility of tables, navigate to ‘Tools’ > ‘Accessibility’ > ‘Reading Order’ in the right panel.
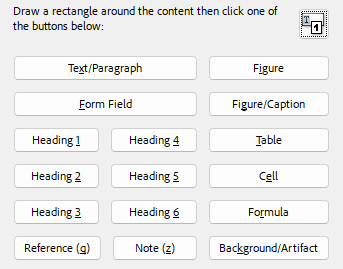
If the table isn’t clearly labelled in the document pane, click and drag across the entire table to select it, then click ‘Table’ in the dialogue box.
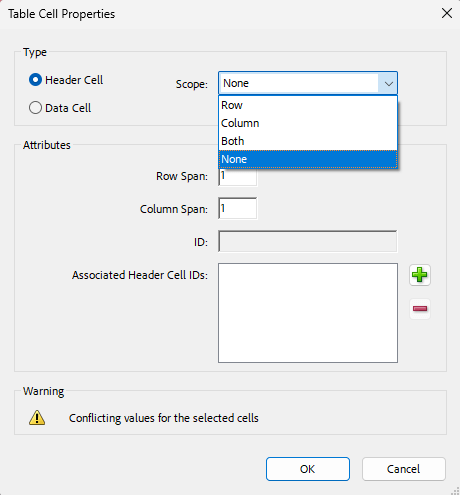
Click ‘Show Table Cells’ to make sure that all cells in the table are defined as individual elements.
Ensure that table headers are correctly assigned to either ‘scope’ the column or the row.
Related Canvas Baseline Practices and Universal Design for Learning
- Canvas Baseline Practices require that all course materials be accessible, including downloadable files.
- Universal Design for Learning supports providing content in multiple, accessible formats that students can customise to meet their needs.
Students who are blind, visually impaired, or otherwise print-disabled
Te Tumu Herenga, Libraries and Learning Services are able to copy entire copyrighted course readings into an electronic format for students who have registered with Student Disability Services. Find out more on the Staff Intranet.
Tools and checks
- UDOIT (Canvas) – flags untagged PDFs embedded in Canvas.
- Adobe Acrobat Pro – includes the ‘prepare for accessibility’ and ‘check for accessibility’ tools.
- Microsoft Accessibility Checker – flags various accessibility issues.
Page updated 27/11/2025 (minor edit)