Panopto video
Panopto supports these learning types (see definitions):
Panopto is a platform to create and share accessible videos. Accessible because it auto-generates closed captions and transcripts, and students can search for keywords and skip to the relevant chapter. Teachers can create in-video quizzes to reinforce learning and there is an analytics dashboard to provide insights on student engagement.
Both staff and students can upload videos to Panopto.
Lecture theatre recordings are automatically added to the Panopto Video menu in Canvas courses.
Getting started
Access Panopto through Canvas
Panopto appears in Canvas’ course navigation.
From a Canvas course, go to the Panopto Video page.
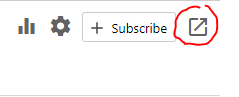
When working with videos, open Panopto in a new browser tab.
Click the Open in Panopto button at the top-right.
Turn on email notifications
New videos are processed to a web-ready format and Panopto can notify you when processing is complete.
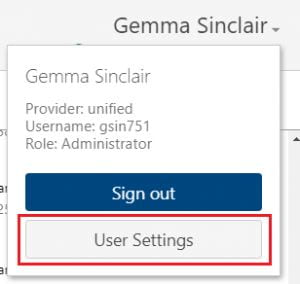
From Canvas, click the Open in Panopto button.
Click your name and select User Settings.
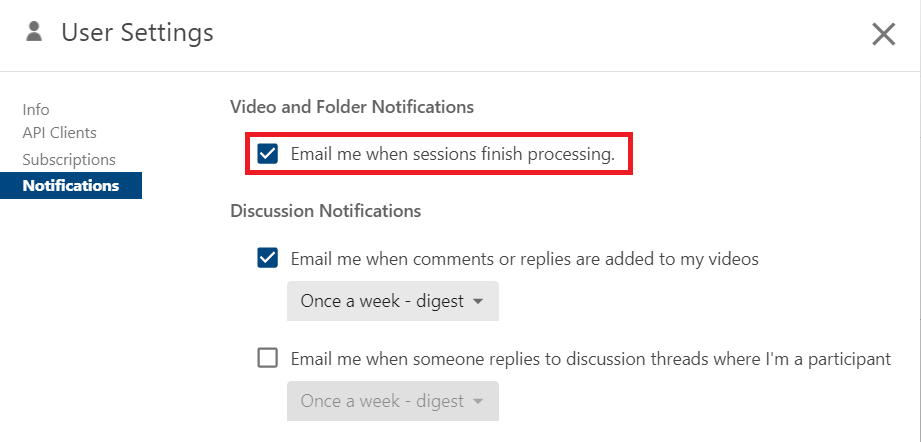
Select Notifications and check Email me when sessions finish processing.
Panopto Guide: The Basics +
Additional guides
Common tasks
Upload video to Panopto and embed it in a Canvas page
Integrate Zoom with Panopto (for automatically importing Zoom Cloud recordings)
Integrate MS Teams with Panopto (for automatically importing recordings of Teams meetings)
From the University of Auckland
Recordings from faculty workshops
Record your screen quick guide
(e.g., webcam or PowerPoint)
From the developers of Panopto
FAQs
See also: FAQs for students.
Why another video platform?
There are a variety of tools to record and edit video, however the goal is to provide a standard platform for staff to easily create and share videos with their class. Recording, trimming and sharing videos are all managed within Panopto and integration with Zoom means that recordings can be be automatically uploaded to Panopto.
Panopto provides the accessibility features that our students require—it’s easy to use and accessibility features (captioning and keyword search) are taken care of automatically. It therefore helps to fulfil one of the priorities of the University’s commitments under Taumata Teitei (vision and strategic plan), and the Disability Action Plan—providing an equitable student experience.
How do I edit a video in Panopto?
Note that Panopto editing is non-destructive, meaning that you ‘mark out’ sections of the video to be skipped during playback rather than deleting them.
- See basic editing for marking out the start or end of a video, or any bits in the middle.
- More detailed editing includes splicing in YouTube clips, inserting documents, adding in-video quiz questions, smart chapters and more. See the Panopto support site for advanced editing.
Editing captions is also possible, i.e., correcting transcription mistakes made by auto-generated captions. Note that this is not a requirement of the University.
How do I merge or splice two or more videos?
- Merging two videos will insert the selected video into the start of the target video, creating a longer video. The selected video will be copied (maintaining the original) but the target video will be overwritten.
- Splicing a video allows you to insert video clips into the timeline of the main video.
How do I upload videos to Panopto?
See our page on uploading video to Panopto.
Can I embed a Panopto video into a Canvas Page?
Yes. Please see our instruction on embedding the video into Canvas.
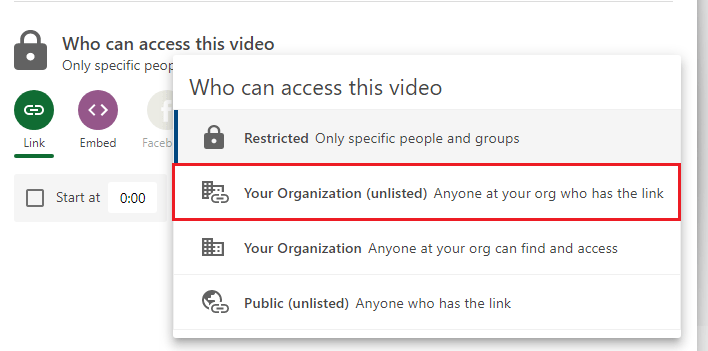
Can I share a link to a video with my students?
If you would like to link to videos on Modules or Pages in Canvas, please ensure that the course folder can be reached. You will need to choose ‘Your Organization (unlisted)” in the Share settings.
If your video is in your personal folder (My Folder), we recommend to move the video from My Folder to the course folder. This ensures that video analytics is meaningful as the viewer statistics are recorded across the course folder, as well as per video.
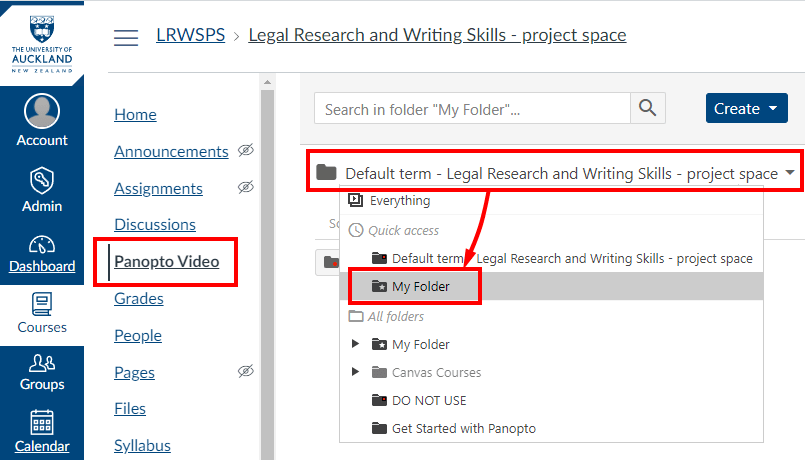
How do I view My Folder (and any others I have access to)?
When you open Panopto Video in Canvas, the course folder is the default. To browse to My Folder, select it from the drop-down list. Other folders that you have access to are also listed.
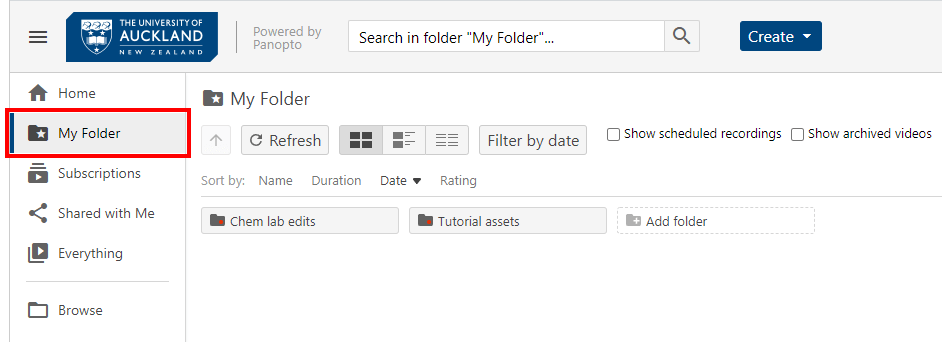
If you have Panopto open in its own browser tab, i.e., not within Canvas, My Folder is accessible from the side menu. The Browse menu will show a list of other folders that you have access to.
For a comprehensive guide, see the Panopto Support article on folder management.
Can students see videos that are in My Folder?
No they can’t, unless you override sharing settings for specific videos or sub-folders. To share video content with students, it is better to move the video into the course folder rather than change sharing settings. See the FAQ above called ‘How do I share video content with students?’
How do I move a video from one folder to another?
Please view the instructions on our support website for moving videos between folders.
How do I copy videos from my old course to the next semester course?
Please see this step-by-step process to batch copy the recordings to a new course.
How long are recordings stored for?
Panopto recordings are automatically archived 13 months after their last view. They can be restored in Panopto by anyone who has access to the video in the course. Restoring an archived video can take up to 48 hours to process in Panopto.
Panopto recordings are permanently deleted after 2 years since last view. If recordings are reused (and actively viewed) they will not be automatically archived or deleted.
What is the publishing delay for lecture theatre recordings and can I change it?
Lecture theatre recordings have a delay of 24 hours before they are published automatically. If you wish to publish your recordings earlier, please refer to this guide.
Can I alter the default publishing time for a Panopto video from 24 hours?
This question pertains to recordings from the lecture theatre capture system, whereby the default release time to students is 24 hours.
Yes you can, but this is a manual process for each video. When you see the video appear within Panopto, you can change the release time in the settings menu. Altering the default time for the whole course is not possible.
![]()
Staff will be able to publish videos early or extend the publishing delay time (up to a maximum of 72 hours). Staff electing to release videos after 72 hours must have a compelling reason for the long delay and should consider the impact on students, including equity student groups.
How do I set up a video assignment for students?
Please view the instructions for Panopto video assignments.
What is Zoom integration with Panopto?
Integrating Zoom with Panopto automates the process of uploading your Zoom Cloud recordings to Panopto. Once Zoom has finished processing the recording, it is uploaded to the nominated folder in Panopto.
Benefits:
- Teachers don’t have to upload the recording manually.
- Captions are automatically provided by Panopto.
- Recordings are stored for 13 months after they were last viewed. The default for Zoom Cloud storage is 60 days.
Caution: All Zoom Cloud recordings are uploaded, including ad hoc meetings. When choosing your nominated Panopto folder, select My Folder rather than your course folder, so that videos are not automatically released to students.
The process is relatively straightforward: Integrate Zoom with Panopto
Note: If you record a PowerPoint presentation, you will need to adjust your Zoom settings to ensure that the correct version of the recording is uploaded. See the FAQ above called: What are the recommended Zoom settings for recording a PowerPoint presentation?
What is Microsoft Teams integration with Panopto?
This guide demonstrates how to link your Microsoft Teams and Panopto accounts so that recordings of Teams meetings are automatically copied to Panopto folders.
Benefits
Recordings stored in Panopto are:
- Easier to find than in Teams
- Captioned
- Keyword searchable
- Able to be trimmed using Panopto’s editing feature
- Easily embedded into a Canvas page
- Important: Stored for 13 months (after last viewed) instead of 90 days in Teams
Note
- These settings are ‘per-user’.
- Only recorded meetings are imported.
- For scheduled meetings, recordings are copied to the meeting organiser’s folder regardless of who initiates the recording.
- For ad hoc meetings, recordings are copied to the folder of the person who starts the meeting and starts the recording. If an attendee starts the recording it will not be copied.
Link Teams to Panopto
This procedure requires you to have an account profile in Panopto, i.e., you either have logged in to Panopto at least once, or you have a teaching role in a Canvas course that uses Panopto Video.
- Search for Panopto from MS Teams ‘Apps button‘. If you cannot see it, log in to Panopto via University of Auckland Single Sign On to register your account, then wait overnight for a batch process to run before trying again.
- Click the ‘Panopto‘ button.

- Click the ‘Add‘ button.

- Click the ‘Open‘ button.

- If prompted, sign in to Panopto through ‘University of Auckland Single Sign On‘.

- Look for the ‘Panopto button‘ in your MS Teams toolbar. Right-click to ‘pin‘ it to the toolbar.
![]()
- Navigate to ‘Settings‘ in Panopto.
Note: The first time you open Panopto’s Settings page you might see a list of teams and their associated channels. This is asking what do you want Panopto to link to. If you skip it, Panopto will only import a copy of your personal meetings. Press ‘Skip‘ for now and link (map) various Teams channels later.
- Click ‘Authenticate‘ to allow Panopto to interact with MS Teams.

- Choose the Panopto folder where your personal meeting recordings will be stored. Note: the default folder is ‘Canvas\username‘. This is the same as ‘My Folder‘ in Panopto.

If desired, you can map Teams meetings by title so the recordings are copied into a nominated folder in Panopto.
- Click the ‘+ New Mapping‘ button.
- Type the meeting title (it will accept asterisks * as wildcards).
- Select a Panopto folder from the drop-down list.
This screenshot illustrates that any meeting starting with “LAW 458” will be copied to the course folder in Panopto.

Note: Each Teams channel will also need to be linked with Panopto if you would like to map the recordings of various meetings held within that channel.
- From the ‘Panopto Settings‘ page, select a channel and click ‘Authenticate‘. Any owner of the channel can do this. This will need to be repeated for nested channels if so desired.

Finally, importing recordings to Panopto can be paused at any time via the ‘Pause Import‘ button.

And Teams’ integration with Panopto can be removed via the ‘Remove‘ button. Any previously imported recordings will not be affected.

Should I download the desktop app or use the in-browser recorder?
Recordings can be made using Panopto either within the browser, or via the desktop app. To help you decide, here are the differences we noticed.
Browser version (Panopto capture)
You can apply a virtual background or blur your background.
Record specific browser tabs or various desktop apps without having to record the entire screen. See Panopto Capture.
Desktop app
You can only record the entire screen so be careful to display only what you want to record. Note: having a second screen will make things easier.
Live webcasting for up to 5000 viewers (with approximately a 40 second delay).
See download Panopto and record using Panopto for Windows or Panopto for Mac.
What about errors in automated captions?
Understandably, some teachers are nervous about auto-captioning due to the likelihood of transcription errors. However, the University is committed to providing accessible resources for the benefit of all students, not just hearing impaired or neuro diverse students, or English as a second language students. And viewing captions, along with listening, can often help learners retain information (CAST, 2018). So captions that contain errors can be more of a help than a hindrance.
That said, some courses are not suited to auto-generated captions, e.g., language courses or dialogue that contains a significant amount of Te Reo.
Where auto-captioning is provided, teachers are advised to post a disclaimer in the Canvas course syllabus page, or where a recording appears in their course content:
Note: Where automatic captions are used in live lectures via Zoom or Panopto recordings, these are generated by text to speech algorithms, so the quality of the captions may vary. Automatic captions might misrepresent the spoken content due to mispronunciations, accents, dialects, or background noise.
Should you wish to manually correct transcription errors—this is not a requirement of the University—follow the steps to edit closed captions in Panopto.
References
How do I provide students with a transcript?
The automated captions of your recording can provide the basis of a transcript. See instructions for how to download a transcript and upload it to Canvas.
How do I view presenter notes while recording PowerPoint slides?
To read presentation notes while recording PowerPoint slides via Panopto, having two computer screens can make things easier. However, you can still achieve this with only one screen.
Note: MAC USERS – you can easily record PowerPoint on your MacBook, without a second screen, while still viewing presenter notes. The browser recording function will allow you to choose the slideshow view to record, even though you are looking at the presenter view. See how in this short video.
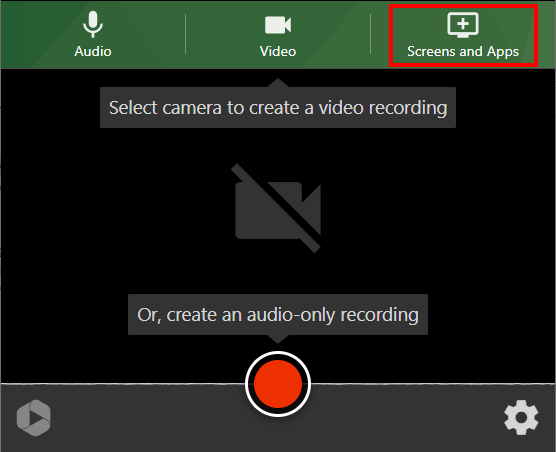
- Have your PowerPoint presentation open and ready to go. In your Canvas course, go to Panopto Video menu, click Create and launch Panopto Capture.
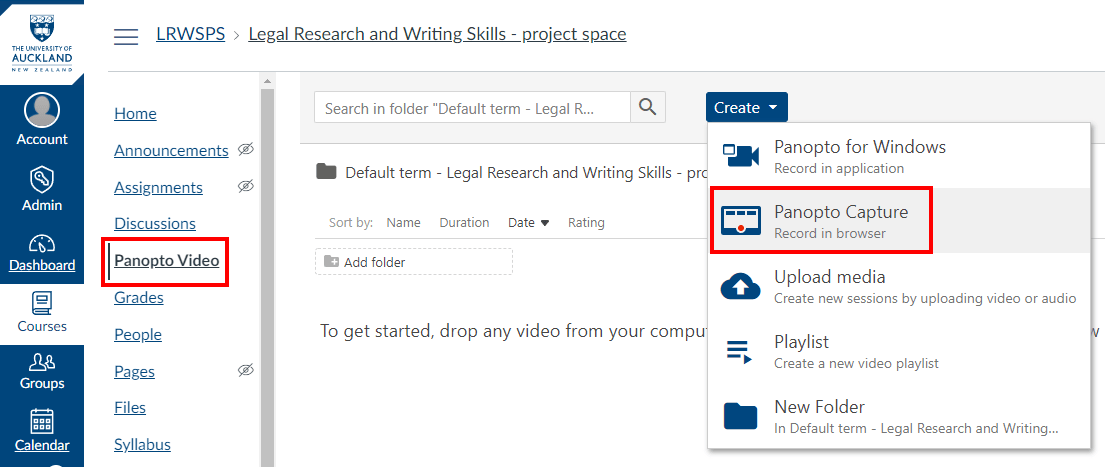
- Select the Screens and Apps button in Panopto Capture.
- Choose the Window tab and select the PowerPoint app from the list of thumbnail images.
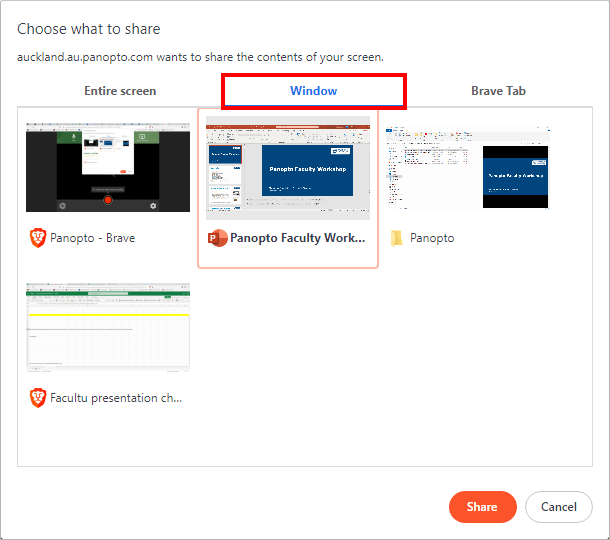
- Click Share. The PowerPoint app will appear inside the Panopto Capture window.
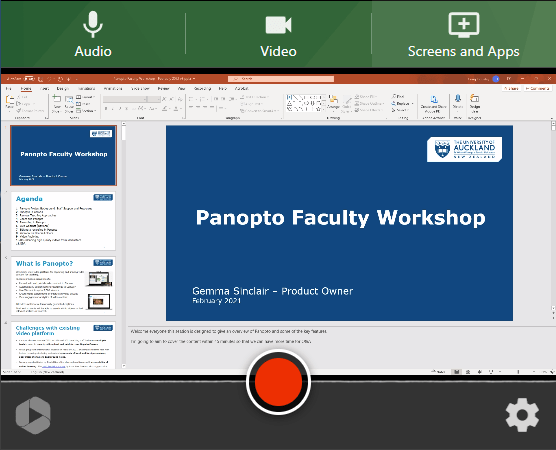
- Go back to PowerPoint app and start the Slide Show

This opens in full-screen mode so you will need to switch between apps using the keyboard. - Press Alt + Tab on your keyboard (Command + Tab for Mac) and switch to the Panopto Capture window that is running within your browser.
You may need to hold down ALT and press Tab several times if you have multiple apps open.

- Start recording via the red record button.
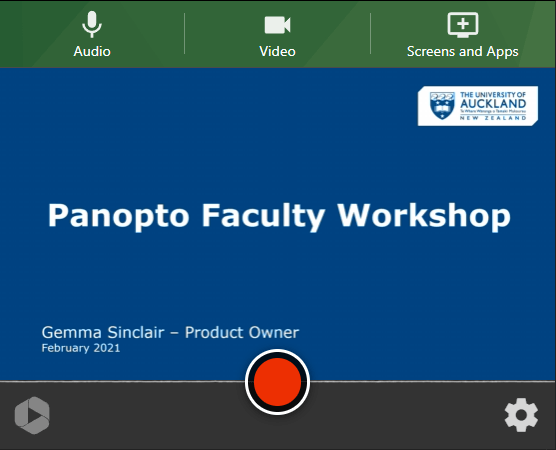
- Press Alt + Tab again and switch to the PowerPoint presenter’s view.
Panopto will continue to record the slides only (slide show view) while you read from your presentation notes (presenter’s view).

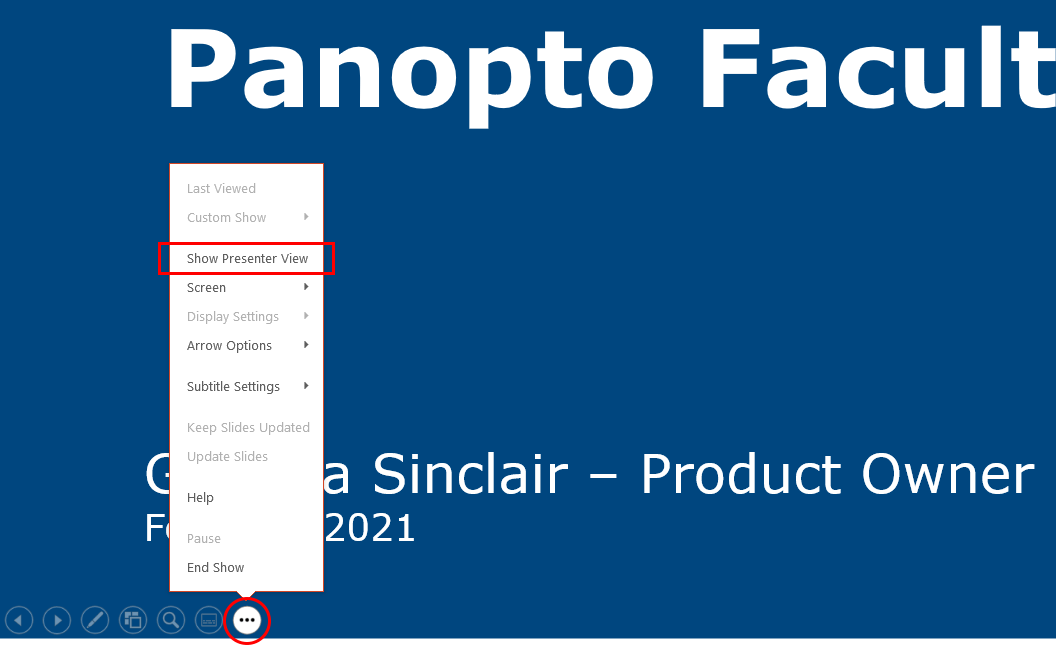
If you don’t see the Presenter’s view from the row of thumbnails, you need to activate Show Presenter View from the slide show.
- When you are finished, press Alt + Tab to return to the Panopto Capture window and click the Stop button.
It takes a few minutes before the recording appears in Canvas. Don’t worry about the messy bits at the beginning and end, you can trim these out later; see the FAQ above on editing a video.
Can I add presentation slides to a video after it has been uploaded to Panopto?
Say there was a video input error while recording and your slides weren’t captured. Panopto enables you to easily add slides during post-editing, explained in this short video (1:41min).
Can I apply for an exemption from having my lectures recorded?
Please see the guide to recording of taught content exemptions page on the central website for more information.
Support
Check out our learning technology support page to find out what options are available for Panopto.
See also…
Page updated 16/12/2025 (minor edit to MS Teams FAQ)